Outlook Email Body HTML Template Designer
The primary use of the HTML Template Designer included in Document Creation using Microsoft Access is for formatting and adding data bookmarks in the email body HTML text template. After the actual filling by the VBA HTMLFiller object, the result is set as the htmlbody of the mailitem – see also Send email using Microsoft Access and Outlook using VBA
Dim hfr As New HTMLFiller
hfr.Load FileName:=strTemplateFile
hfr.FillElement Bookmark:="Amountdue", _
  Value:=ControlValue(control:=![Amount due])
'...
Dim appOutlook As Outlook.Application
Set appOutlook = New Outlook.Application
Dim mimEmail As Outlook.MailItem
Set mimEmail = appOutlook.CreateItem(olMailItem)
mimEmail.HTMLBody = hfr.HTML
A second supported use is to generate HTML4 pages from your database. To make this use available go to ribbon Preferences and there select the Ribbon tab. You can now check the option to include the HTML wizard in the ribbon.
HTML Template Designer
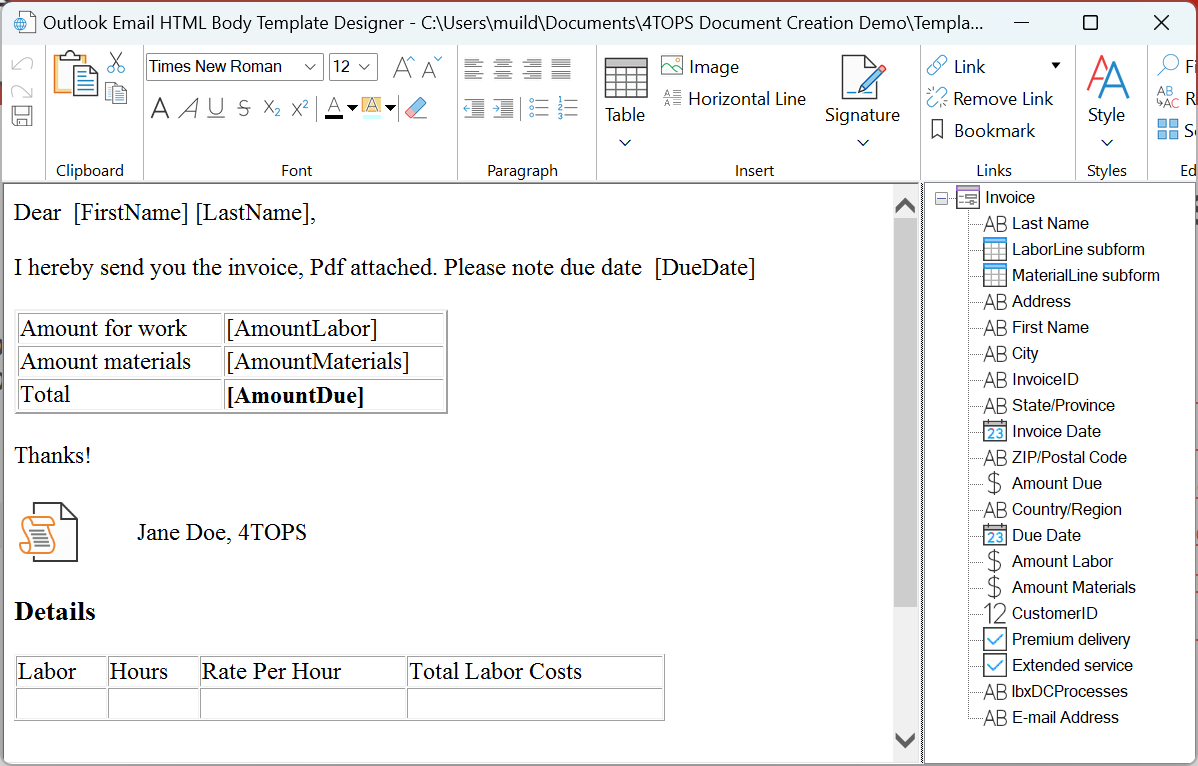
The HTML Template Designer has a familiar interface inspired from Outlook.
Data pane: email body html based on values in the database
On the right is a pane from which you can drag and drop items made available from the Microsoft Access database, usually from a a form considering a form is most expressive.
HTML mode
You can switch between normal editing and HTML editing modes using the HTML button on the ribbon. The latter mode allows you to drag value data items into HTML attributes.
Use your Outlook signatures
These can be inserted for convenience from the Signatures list on the ribbon.
Transfer simple data elements: Text, numeric, dates
Data generally are simply inserted to the bookmarked locations as determined by you in the Template Designer, e.g. text such as the page title (Usage) or the text in the introduction (after when) are taken from data field (text control: Header), or a currency field (Amount due): € 7,50. Dates can appear in the text formatted as you like using the Format expression argument in the appropriate data transfer code line, e.g. 03-Oct-23.
Hyperlinks
Access has a field type Hyperlink, e.g. Template Designer. This is convenient, but some experienced developers think it better to avoid this and use text fields instead, e.g. https://www.4tops.com/. Anyway, both are supported here.
Images
Images can be stored as an url address (the image here placed on the right) or as a filepath. Alternatively, you can store images in Attachment fields (as was one with the Icon at the top). The dummy image can be used to indicate required position and size to be applied to the image. By default, the size is based on the width of the dummy using fixed scaling, but this can be overruled in the FillPicture procedure call.

Different lists representations
In the Introduction you saw a numbered list. You can fill such list your form using a subform which has only one visible column. The list can simply be altered to a bulleted list format using the HTML Template Designer ribbon (Paragraph > Bullets), or to a text enumeration by switching to bookmarked location to a non-listed paragraph: Formatted date in text, Numbered list, List as text line, Bulleted list, Table column selection and order, Table column headings, Add Image and Image sizing.
Table example: features supported with different Office documents
In combination with queries included on your form using a subform you can include any information tables in the document:
| Feature | Word | Excel | PowerPoint | Outlook |
| Add Image | + | – | + | + |
| Add OLE Object | + | – | + | – |
| Bulleted list | + | – | + | + |
| Checkboxes for Yes/No | + | – | + | + |
| Formatted date in text | + | – | + | + |
| Highlight text | + | – | – | – |
| Hyperlinks | + | + | + | + |
| Image sizing | + | – | + | + |
| Image wrapping | + | – | – | – |
| Insert File | + | – | – | + |
| List as text line | + | – | – | + |
| Numbered list | + | – | + | + |
| Optional Text | + | – | – | – |
| Page header and footer | + | – | + | – |
| Plain list | – | + | – | – |
| StrikeThrough | + | – | – | – |
| Table column headings | + | + | + | + |
| Table column selection and order | + | + | + | + |
Insert text from file
This can be done by having a text control with Tag HTMLFile containing a reference to a file, either local or on the web. As an example the below text:
Lorem ipsum dolor sit amet, consectetuer adipiscing elit. Maecenas porttitor congue massa. Fusce posuere, magna sed pulvinar ultricies, purus lectus malesuada libero, sit amet commodo magna eros quis urna. Nunc viverra imperdiet enim.