Word document creation – the Template Designer
The Word Template Designer add-in included in 4TOPS Document Creation using Microsoft Access is fundamental to setting up the Word document creation process. It lets you position bookmarks representing data, tables, images, texts and more from your data source in a Word template. It communicates back to the document creation process wizard what elements of the data source are actually used, allowing the wizard to generate VBA automation code that is accurate, adaptable and fast. (Note: you can use 4TOPS Document Creation without having to see or get involved with the underlaying VBA code.)
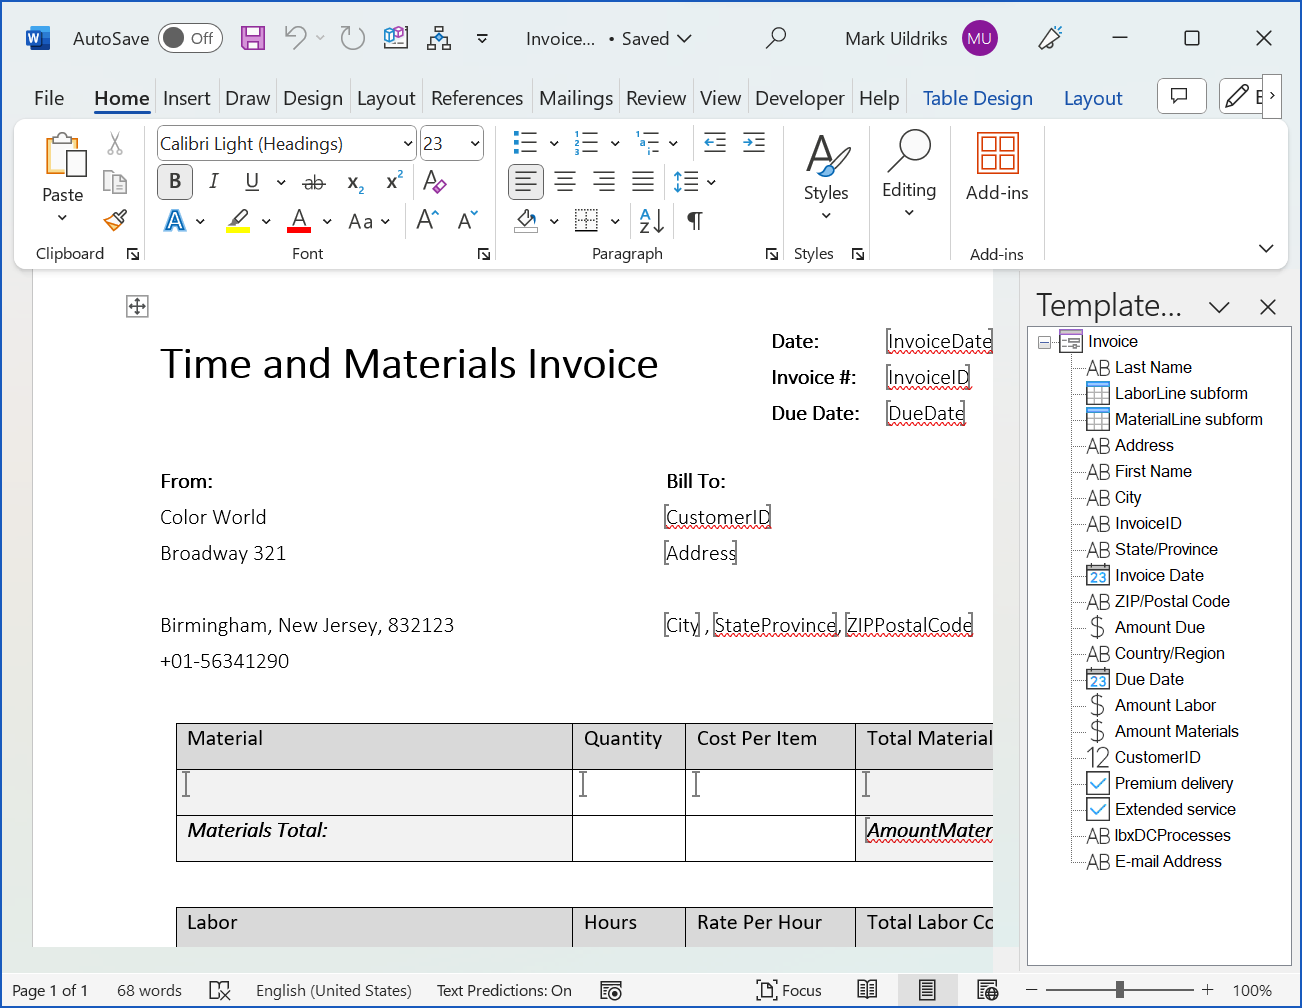
Use drag and drop to insert elements of the data source into the document. Note the special support for filling Word tables explained below.
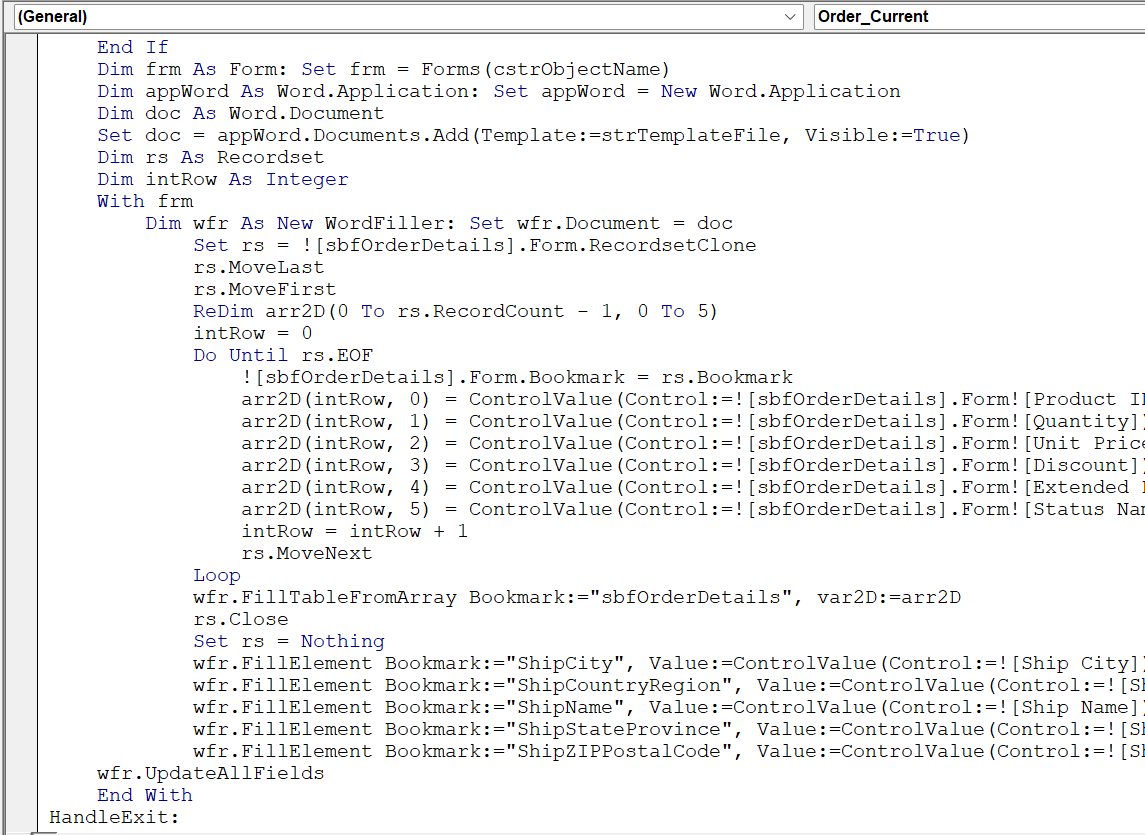
Word document creation: VBA Code transferring data
When actually used, a document creation process picks up the display values from the relevant controls on the MS Access form or datasheet (data source). These values are then inserted in locations marked by a corresponding bookmark. In case the same source element is placed in multiple positions in the document we make use of a cross reference field with reference type bookmark referring to the first instance.
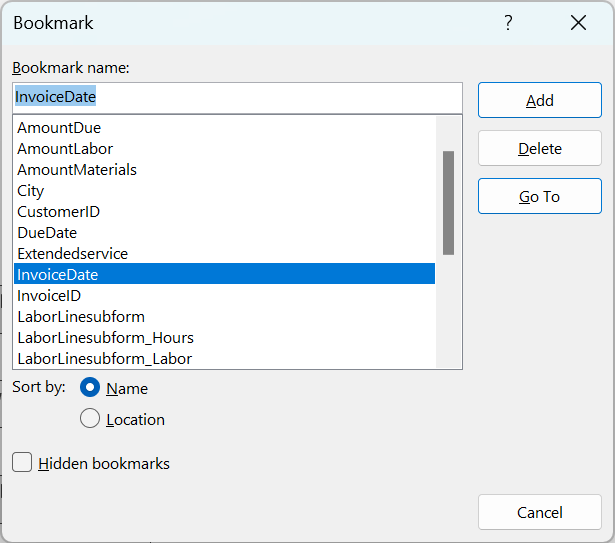
Word bookmark names
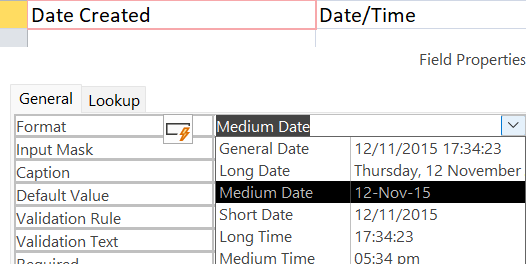
The Word bookmark names must take into account certain naming restrictions. This is taken care of by the process wizard which provides the list of controls and their corresponding bookmark names to the Template Designer (see top image) to display in the pane on the right.
Values and formatted data
When you run a document creation process the data from a form control is transferred into the new document created from the template you designed. The most basic kind of data to be is a simple value obtained from a control. However, in practice things are more complicated as in Access the developer has significant means design the application to get the user interaction with data that suit the purposes best:
- Access forms have multiple ways to present data such as multi-column list- or combo- boxes or getting the selected value in a group box.
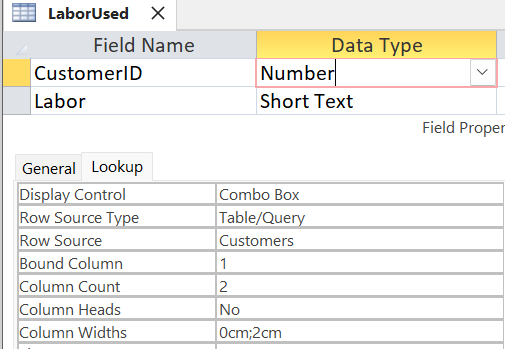
- In some cases there we need to distinguish between display and bound value, e.g. in CompanyID the value could be either an ID number or the name of the company, the latter being usually more informative.
- The display value may further be affected by a formatting expression
Function ControlValue
Fortunately, getting the value to be used in the Word document is much simplified by ControlValue function included in the AccessControl module inserted by the process wizard’s VBA code generator. Function ControlValue has the following interface
 Public Function ControlValue(Control As Object, Optional UseDisplayValue As Boolean = True,
 Optional Format As String = "") As Variant
This function is used with each simple data element transfer included by the wizard – on instigation of the Template Designer – in the document creation process code on e.g.
Dim wfr As New WordFiller: Set wfr.Document = doc
wfr.FillElement Bookmark:="CustomerID", Value:=ControlValue(Control:=![CustomerID])
Bound or Display value
In the above example this would put the Company Name in the document, this having been identified as the meaningful (Display) value to identify the company using the Lookup properties.
In case we would instead want the CompanyID, we can add the UseDisplayValue function argument and assign False to it:
Public Function ControlValue(Control As Object, Optional UseDisplayValue As Boolean = True,
Optional Format As String = "") As Variant
If we want both the ID and the name, the royal way is to add an extra control CustomerName to the form which gives the required extra value. This way you can add it using drag and drop in the Template Designer. The alternative would be to use Word’s Insert bookmark tool and manually add the extra line of code that uses this extra bookmark. However, using this approach can lead to loss of the extra line when you use the Template Designer (started from Manage processes) to make changes as this updates the data transfer code.
Formatting the returned value
The generated code makes it easy to apply a VBA Format expression, as commonly used with numbers and dates. Actually, this is done for you in case of fields of type date, where the formatting expression is copied from your formatting preferences. An example for text in bookmarked location in document
wfr.FillElement Bookmark:="DueDate", Value:=ControlValue(Control:=![Due Date], Format:="dd mmm yy")
or as part of the filename
strFileName = ReplaceIllegalCharacters(ControlValue(![CustomerID]), "_") & _
                ControlValue(![Invoice Date], Format:="yymmdd")
Note that you are free to change the expression used in a specific line any way you like.
Inserting tables
Tables of data regularly appear in documents. To have them made available requires you to work with Access subforms. The image at the top shows control LaborLine Subform dropped on a document location. A dialog pops up allowing you to change the originally given order of columns, optionally skipping some by unchecking the column name. After insertion you can change the column names or styling, add a summary row all to your liking. Only the bookmarks indicating the first row (LaborLinesubform) and the column bookmarks (LaborLinesubform_Hours, etc.) in that row need to stay as the are used in the table filling process.
Special applications for Boolean data values
Boolean values in the Access data source can have different applications in filling the document. They can used to set checkboxes to True or False, they can make a text have font StrikeThrough indicating it is not valid, they can determine if a text is to be included, or they can be used to highlight text. Which behaviour occurs is determined by how you format the bookmark. Whatever you choose, the situation will be handled by the ApplyBoolean method. The first on the right shows the input data, the second how you can change the formatting in the template to get the required behaviour, the third the result after running the Word document creation process.
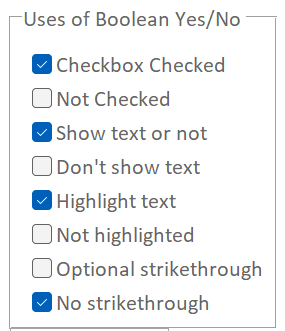
Input data on the Access form

To specify the required behaviour different from showing a boolean value as a checkbox, replace the checkbox by the required formatting, e.g. (Show text or not) between round brackets indicating optional text in the True and False columns in the second row.

After running notice in the True column the text still appears, now with the round brackets removed, while in the False column the text has disappeared.
Checkboxes: checked or not
When inserted using the template designer the default interpretation is assumed, checkboxes, where True corresponds with Checked and False with Unchecked. For this inside the bookmark the ChrW(9746) symbol (False: ChrW(9744)) is used.
As already said, by replacing the checkbox and adding some formatting you can obtain alternative use for boolean input which is discussed next.
Optional text
To include text or not put the text between round brackets: (my optional text)
True: my optional text False:
StrikeThrough
To have text optionally StrikeThrough, apply that: optional strikken text
True: optional strikken text False: optional strikken text
Note that the interpretation here is not that True means apply strikethrough. We have chosen for the meaning strike text through if the statement is false.
Highlight
To have text optionally Highlighted, apply the highlight:
True: Highlight False: Highlight
In the wizard generated code, using the WordFiller object, it is called like
Generated code: ApplyBoolean
For filling this part of the template the following line of code is generated.
wfr.ApplyBoolean Bookmark:="Extendedservice", Value:=ControlValue(Control:=![Extended service])
You may want to tweak the semantics using Not to make a more intuitive correspondence where unchecked stands for ‘strike the text through’. The result could then look like
wfr.Strikethrough Bookmark:="Extendedservice", Value:=Not ControlValue(Control:=![Extended service])
Image insertion
If the field contains the name of a file (local or on the web, including http…) you can insert the data element (let’s assume it is called Image) and then alter the generated VBA code to
wfr.InsertPicture Bookmark:="Image", Value:=Not ControlValue(Control:=![Image])
You can insert a sample image in the bookmark to show the place it will take and set its size. During insertion the replacing image will resize so that it takes the height or width, depending on the optional third MainResize argument which is of enum type dcResizeMain whose values are NoResize, ResizeWidth or ResizeHeight.
Different lists representations
In the Introduction you saw a numbered list. You can fill such list your form using a subform which has only one visible column. The list can simply be altered to a bulleted list format using the HTML Template Designer ribbon (Paragraph > Bullets), or to a text enumeration by switching to bookmarked location to a non-listed paragraph: Hyperlinks, Formatted date in text, Checkboxes for Yes/No, Numbered list, List as text line, Bulleted list, Table column selection and order, Table column headings, Insert File, Add ImageandImage sizing.
Hyperlinks
Access has a field type Hyperlink, e.g. Template Designer. This is convenient, but some experienced developers think it better to avoid this and use text fields instead, e.g. https://www.4tops.com/. Anyway, both are supported here.
Insert text from file
This can be done by having a text control with Tag TextFile containing a reference to a file, either local or on the web. As an example the below text:
Lorem ipsum dolor sit amet, consectetuer adipiscing elit. Maecenas porttitor congue massa. Fusce posuere, magna sed pulvinar ultricies, purus lectus malesuada libero, sit amet commodo magna eros quis urna. Nunc viverra imperdiet enim. Fusce est. Vivamus a tellus.